by admin | Nov 7, 2025 | WebRTC
This is going to be an advanced post on using getUserMedia effectively in real world use cases while creating production grade applications. If you you are a beginner, please check this post first before going through this post.
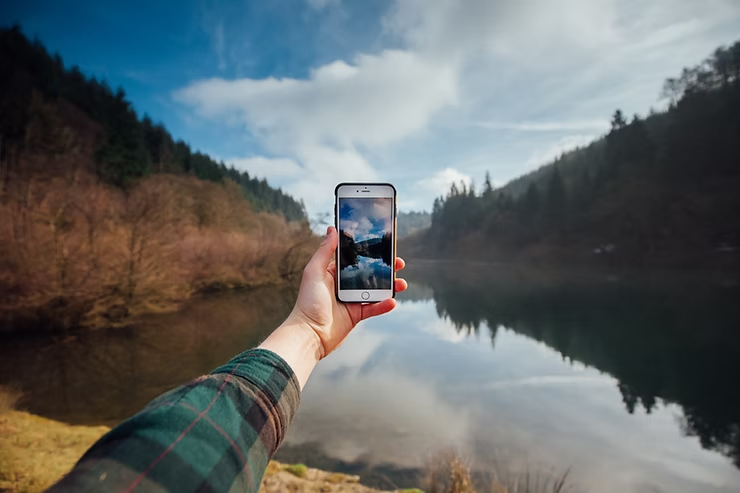
While developing video conferencing applications, the getUserMedia browser API provides the capabilities to capture the audio and video streams and send these streams to the receiving parties with the help of RTCPeerConnection. In this article, we will discuss the twin concepts of capabilities and constraints to understand the browser’s capabilities of capturing the media streams with the applied constraints.
Here is how the process works.
- Call MediaDevices.getSupportedConstraints() (if needed) to get the list of supported constraints, which tells you what constrainable properties the browser knows about. This isn’t always necessary, since any that aren’t known will simply be ignored when you specify them—but if you have any that you can’t get by without, you can start by checking to be sure they’re on the list.
- Once the script knows whether the property or properties it wishes to use are supported, it can then check the capabilities of the API and its implementation by examining the object returned by the track’s getCapabilities() method; this object lists each supported constraint and the values or range of values which are supported.
- Finally, the track’s applyConstraints() method is called to configure the API as desired by specifying the values or ranges of values it wishes to use for any of the constrainable properties about which it has a preference.
- The track’s getConstraints() method returns the set of constraints passed into the most recent call to applyConstraints(). This may not represent the actual current state of the track, due to properties whose requested values had to be adjusted and because platform default values aren’t represented. For a complete representation of the track’s current configuration, use getSettings().
Defining Constraints
A single constraint is an object whose name matches the constrainable property whose desired value or range of values is being specified. This object contains zero or more individual constraints, as well as an optional sub-object named advanced, which contains another set of zero or more constraints which the user agent must satisfy if at all possible. The user agent attempts to satisfy constraints in the order specified in the constraint set.
We also need to check first if the constraints we are going to apply are supported by the user agent / browser or not. In the below code, it first checks if the constraints are supported or not and then applies the constraints.
let supports = navigator.mediaDevices.getSupportedConstraints();

if (!supports["width"] || !supports["height"] || !supports["frameRate"] || !supports["facingMode"]) {
  // We're missing needed properties, so handle that error.
} else {
  let constraints = {
    width: { min: 640, ideal: 1920, max: 1920 },
    height: { min: 400, ideal: 1080 },
    aspectRatio: 1.777777778,
    frameRate: { max: 30 },
    facingMode: { exact: "user" }
  };

  myTrack.applyConstraints(constraints).then(function() => {
    /* do stuff if constraints applied successfully */
  }).catch(function(reason) {
    /* failed to apply constraints; reason is why */
  });
}
Here, after ensuring that the constrainable properties for which matches must be found are supported (width, height, frameRate, and facingMode), we set up constraints which request a width no smaller than 640 and no larger than 1920 (but preferably 1920), a height no smaller than 400 (but ideally 1080), an aspect ratio of 16:9 (1.777777778), and a frame rate no greater than 30 frames per second. In addition, the only acceptable input device is a camera facing the user (a “selfie cam”). If the width, height, frameRate, or facingMode constraints can’t be met, the promise returned by applyConstraints() will be rejected.
MediaStreamTrack.getCapabilities() is used to get a list of all of the supported capabilities and the values or ranges of values which each one accepts on the current platform and user agent. This function returns a MediaTrackCapabilities object which lists each constrainable property supported by the browser and a value or range of values which are supported for each one of those properties.
Example
The most common way of using constraints is while calling getUserMedia() to capture the streams.
navigator.mediaDevices.getUserMedia({
  video: {
    width: { min: 640, ideal: 1920 },
    height: { min: 400, ideal: 1080 },
    aspectRatio: { ideal: 1.7777777778 }
  },
  audio: {
    sampleSize: 16,
    channelCount: 2
  }
}).then(stream => {
  videoElement.srcObject = stream;
}).catch(handleError);
In this example, constraints are applied at getUserMedia() time, asking for an ideal set of options with fallbacks for the video.
The constraints of an existing MediaStreamTrack can also be changed on the fly, by calling the track’s applyConstraints() method, passing into it an object representing the constraints you wish to apply to the track.
videoTrack.applyConstraints({
  width: 1920,
  height: 1080
});
Retrieving current constraints and settings
It’s important to remember the difference between constraints and settings. Constraints are a way to specify what values you need, want, and are willing to accept for the various constrainable properties, while settings are the actual values of each constrainable property at the current time.
If at any time we need to fetch the set of constraints that are currently applied to the media, we can get that information by calling MediaStreamTrack.getConstraints(), as shown in the example below.
function switchCameras(track, camera) {
  let constraints = track.getConstraints();
  constraints.facingMode = camera;
  track.applyConstraints(constraints);
}
This function accepts a MediaStreamTrack and a string indicating the camera facing mode to use, fetches the current constraints, sets the value of the MediaTrackConstraints.facingMode to the specified value, then applies the updated constraint set.
Unless we only use exact constraints (which is pretty restrictive, so be sure we mean it!), there’s no guarantee exactly what we are going to actually get after the constraints are applied. The values of the constrainable properties as they actually are in the resulting media are referred to as the settings. If we need to know the true format and other properties of the media, we can obtain those settings by calling MediaStreamTrack.getSettings(). This returns an object based on the dictionary MediaTrackSettings. For example:
function whichCamera(track) {
  return track.getSettings().facingMode;
}
This function uses getSettings() to obtain the track’s currently in-use values for the constrainable properties and returns the value of facingMode.
In case you are looking for any specific help with your production video conferencing application related to camera quality issues, do let us know at hello@centedge.io. We will be delighted to help.

by admin | Nov 7, 2025 | WebRTC
In this new world of post covid-19, video collaboration is the new normal irrespective of the industry segment. As the work is going remote, video collaboration is a must in order to keep that human touch. A secure video collaboration tool is a need of the hour but there is no one size fits all tool available even today as every need is not the same. Building a video collaboration tool doesn’t mean it should cost a lot of time and resources. There are very good open source libraries available with their unique strength and weaknesses. But as the open source is not designed while keeping your unique needs in mind, a good amount of resources in terms of time and money need to to be dedicated to create a video conferencing system from scratch. We are here to help as a consultant in the complete life cycle of your product development for your unique use case. Listed below are the high level things to consider for developing a production grade video conferencing app.
The steps of building a video conferencing app can broadly be divided in to the below mentioned steps.
Defining your need (real need, aka the product road map)
Building a video conferencing system is not like building another web app. It is much more complicated than that as it has much more complexities in terms of technical things to deal with. That’s why we help our clients with the need definition so that we are crystal clear before writing even a single line of code. This also helps in setting our esteemed customer’s expectations properly and helps the development team in achieving the defined milestones in a timely manner without time and cost overruns. Click this link to Learn more about building a product road map.
Choosing the correct tech stack
Choosing the correct tech stack to build your app is very critical to meet the timelines as defined in the product road map. A product road map is a bunch of assumptions which meets the reality through the correct tech stack. There will be considerations like availability of good developers in the chosen stack, availability of reusable open source components according to the architecture, architecting the app to support agile development practices while sticking to the defined time lines, modularity along with flexibility and maintainability of the code base etc. There is no right or wrong approach here. Based on the use case, the tech stack and the architecture will vary. But overall, from our experience we can say that Javascript as a language, Nodejs as server and Reactjs as frontend language go well for building a production grade video conferencing system.
Building the app
Once the product road map is there, tech stack is decided and a high level architecture is in place, It is time to write the code. The code has to be written in a modular manner so that is will be easy to maintain a large code base a t a later point in time when the use case grows which leads to a swell in the number of lines of code. Keeping things DRY (Don’t Repeat Yourself) also becomes super important to follow as the code base grows. There are many other coding best practices to follow so that it is easy for a new developer joining at a later stage to understand the codebase within a short period of time. Below is a link to 50 coding best practice to follow for Javascript.
Testing the app
Testing the app is super critical to deliver the consistencies knowing that the best of the best developers also make mistakes while writing codes. Testing a WebRTC app in it’s length and breadth also become super critical not only to test the logic written in the code directly but also to test the indirect part of it like testing the app in different network conditions, different browsers, different devices etc. Here is a nice blog written by a globally renowned WebRTC evangelist about his view on WebRTC testing. Here is the link.
DevOps (Cloud deployment / Scaling)
Devops plays a very critical part in success or a failure of a WebRTC app. WebRTC needs at least 2 kind of servers(application and signalling) which can go upto 6 servers( application, signalling, media, recording, NAT Traversal and recording post processing). Specifically media and recording servers need good CPU, Memory and Network bandwidth even for 1 successful call. The ideal media server is a c5.xLarge VPS which is 4 core CPU with 8-16gb of RAM and 10GBPS network. Ideal recording server is a c5.large VPS. It is always good to prefer a compute intensive VPS for media and recording related things. Scaling from 1 meeting to 100 meetings is more of an Art than science. It needs a good command over dev-ops best practices and a deep knowledge of your chosen cloud vendor to achieve good results in scaling.
Post implementation
As WebRTC is a moving target, keeping a good post implementation support team is critical to the success of the product. The point to note about the post implementation support is that, the service can break any time due to not fault of your code but for some random change in a popular browser after a recent upgrade. Therefore it is important to keep a good post implementation support team for your production grade WebRTC app.
We recently started our consulting practice to help others plan and execute their video conferencing trek in a better way. Do drop us a mail at hello@centedge.io about your plans and we will be happy to help you.

by admin | Nov 6, 2025 | WebRTC
As this post is being written, videoedge magic rooms v2.0 is now out and has opened it’s doors for public beta starting from today i.e. 21/01/2021. The biggest change from v1 to v2 is that private rooms are now available for use with all the features that were available on our public demo room released in the v1 last month. As we were completely occupied with fixing the bugs reported by our early users, we didn’t get any time to write a v1 release note. We are sorry for that. Going forward, we will try to write a release note for every major release. We also are hugely thankful to our early users who used the buggy v1 and gave us the important feedback in order to make the v2 possible.
Below are the list of primary features which are currently available and ready for use.
- Unique shareable room link
- Private meeting rooms for registered users. The public demo room is available as usual for all the non registered users.
- Pre-call Camera /Mic / Speaker selection
- Group conferencing up to 6 participants (Our code can handle up to 30 but our tiny demo server cannot !)
- In call Mute/ Un-mute and camera on /off
- Moderator mode for being able to authenticate users before joining the room
- Moderator able to mute/ un-mute others, switch camera off of others (can’t switch on others camera due to privacy concerns) and kick others out of the room
- Viewer mode enabled for people to join as a viewer / listener only without participating in the ongoing discussion
- Screen-share by one or more moderator or participant. Viewers can’t screen-share!!
- Publish an IP camera to the room for everybody to view. This is particularly useful for security and surveillance use cases where a video conferencing can be done to take real time decisions while viewing IP / cctv / drone cameras. Keep in mind that, it currently supports an input source in the RTSP format only.
Here is the link to the recently released videoedge magic rooms.
In case you are facing any issue with the videoedge magic rooms while using it or it is not working for some reason, don’t hesitate to let us know the issue and we will try to fix it up with priority. In case you like it and want us to add a new feature for your use case, please let us know as well. We are reachable at hello@centedge.io

by admin | Nov 6, 2025 | WebRTC
Centedge Magic room is here, finally! It was long last month where many battles had to be fought, both inside inside and outside of VS code(the code editor we use!) to reach here. The whole story will take it’s own time to come out.
Now coming to straight to the point as this post is going to be a release note for our latest release. This is the most anticipated release from our side as it has all of the things needed to run a meeting, audio/video, screen sharing, recording, chat along with innovative room configuration options to configure your video rooms for any kind of use case from a intuitive dashboard.
Here are the key features.
- Unlimited group meetings in personal room(without recording !)
- Configure and use magic rooms with all features including recording
- 2 configurable magic rooms with up-to 100 hours of usage and 1 GB of free cloud recording are included in the free plan
- Option use it as a shared service at meet.centedge.io or have it at your own custom sub domain like arbalest.centedge.io as a dedicated service
- Fully possible to host it in your own enterprise cloud / data centre
- Perfectly possible to consider this as a base video room and build your own service on top of it with our custom support and customisation plans
- All cutting edge things like Simulcast/SVC, Auto scaling of infrastructure based on demand, active speaker detection, real time bandwidth monitoring etc. are either already implemented or in the pipeline. To check simulcast implementation, join the room from a desktop and a mobile device to verify that they both are using different bit-rates (XX Kb/s) for the same user video.
Currently once either has to build a video conferencing service from scratch if one want to own the service but it needs a good amount of time, effort and expertise for the same. The other option is to rent out from somebody with less cost but you really can’t own the service. Our goal is to provide you the best of both worlds where we let you own your own video conferencing service without renting it out as well as without spending a good amount of time and effort in building it. With us, you can own a video conferencing service within a day or 2 with resources as low as $$$$ / year and use it for unlimited time and unlimited users.
We also are working on a not for profit plan so that not for profit organisations looking for dedicated video conferencing applications for their needs can now adopt our dedicated solution at a unbelievable price of 1$$$ / year with support and up-to 3 customisation requests included in that plan. A separate detailed post will be shared in a couple of days with relevant details regarding this offering.
Here are the full set of features.
- Unique room Link
- Select Camera / Mic
- Live streaming up-to 20 participants
- Group conferencing up-to 12 participants
- Mute/ Un-mute
- Video On/Off
- Option to join as presenter / viewer
- Room Moderator settings
- Screen share
- Publish IP camera to meeting Room
- web/mobile browser(Chrome/Safari)
- Recording (Sever side Only)
- Store recordings in AWS S3
- Unlimited personal room usage (without recording!)
- Create Static and / or Dynamic room from dashboard
- Active speaker detection
- Real time bandwidth monitoring
Note :- As we are running on a small scale infrastructure based on the available credits we have from AWS, the service may not be as great as a production grade video conferencing application. The purpose of this app is to let everybody know that there are guys like us also exist who build good things silently and let the app make noise at its own time. We know that we may not have reached there yet so that our app will make noise but we will reach there soon.
If you are looking for building a video conferencing app either for video banking, video insurance, video surveillance,video education or video health, do let us know. We will be super happy to help you build your own app or enhance your existing one to make it better. There is also another great option to adopt our service as a managed service for your own use case and build on top of it.
Here is the link to our latest video rooms:- Magic rooms
We are reachable on email at hello@centedge.io. You also can chat with us using the chat widget on this website. We typically respond within 5 minutes or sooner for chat and 1 day (max.) for email . You can schedule a free 30 mins call with one of our senior consultants using this link for resolving your doubts/ concerns not only about our services but also about how your existing services using WebRTC for video conferencing or live streaming can be improved. Here is our LinkedIn page to stay connected.
Happy to help.

by admin | Nov 6, 2025 | WebRTC
What can be the ways to find a needle in the haystack? One of the ways can be to deploy multiple people with magnifying glasses based on the area of the haystack and then announce a big prize for the person who can find the needle. In this case the the amount of prize money will be directly proportional to the enthusiasm among the people to find the needle.
There can be another way where one individual can attach a magnet at the end of a wooden stick and try to sweep the floor with with this intelligent device. The needle will automatically come to the magnet. No need to deploy a lot of people and money.
These days, trying to find a good WebRTC developer is like trying to find a needle in the haystack.WebRTC has grown 100x during 2020 especially due to the pandemic situation. Video became the default medium for teaching/learning, banking, insurance, online only events and WebRTC became the default technology. In this situation where more and more enterprises as well as startups are adopting WebRTC on an on going basis, the demand for good developers is rising exponentially. But there are very few WebRTC developers globally who know WebRTC in its totality and have build more than one application from scratch. There are people who know a couple of things by reading from the internet but that is not enough to know things that is needed for building a production grade WebRTC application. As an employer looking for WebRTC developer, one has 2 choices now. First choice is to hire a developer who knows a little bit WebRTC and train him /her house. In this approach, the percentage of developers becoming productive in a short time will be less to very less. The reason is not that the developer is not good or the content is not good but the amount of time the developer takes to be able to contribute actively to the project is highly unpredictable. Some developers take a month or others may take 2 months but still don’t get the things properly. This is the first approach of deploying people with magnifying glasses to find a needle. Here there is a 50% probability that one will get the needle. There is still a gap of 50% of not finding the needle.
Unfortunately, there is no second approach of deploying a magnet to find the needle in this case. As there are very few WebRTC magnets available globally, they have simply become unaffordable or unavailable. When we ourselves trying to find good developers, we had go through the same situation.When we floated the application for a WebRTC developer position last month, 40+ candidates applied where as only one candidate was able to complete the coding test given by us as a 1st level selection criteria. Being in WebRTC for 7+ years now, we now realised that it is a serious problem not only for us but also for many others.
In order to solve this, we took down some time a prepare an intensive hands-on 3 -4 weeks workshop for all the new people who are going to join us. The course material is carefully designed in such a way that even the non WebRTC guys will be able actively contribute to projects in a month. We now plan to take full stack developers good in MERN/PERN(Mongo/Postgres, Express,React,Node) without being bothered about their WebRTC knowledge and make them either Frontend WebRTC developer, Backend WebRTC developer, Full stack WebRTC developer or a DevOps WebRTC developer.
Below is a brief of the way we are planning to conduct the workshops in the coming months for the people we hire in our team.
 Week 1: Build a baseline MERN/PERN app from scratch with basic user authentication, api routes, proper folder structure etc.

Week 2: Build a basic signalling server for a p2p video calling app using WebRTC. Here they will learn how to use the WebRTC APIs like getUserMedia/getDisplayMedia to capture the camera or screen, RTCPeerConnection to connect both peers in order to transfer media and a little bit of RTCDataChannel

Week 3: Enhance the p2p application to a full fledged application with rooms by integrating a SFU like janus or mediasoup(by default we will be using mediasoup).By end of this week, the candidate will know how to build a video conferencing application using a media server.

Week 4: Here they will learn how to deploy the application in a cloud like digitalocean or AWS, so that the application can now be accessed over internet.

Week 5(optional): Dedicated to advanced topics like scaling the application, active speaker detection, real time bandwidth monitoring, advanced UI optimisation for large group calls, reading the real time stats of the call etc
It has been structured based on our 7+ years of experience in dealing with WebRTC related stuffs and how people without much knowledge of WebRTC tend to learn things fast when the course is structured properly.
We are planning to hire 1 or 2 devs in each quarter based on growth, but we still need to put that much effort in training them well as low quality of devs has a direct impact on the quality of the product. In each of our training programs, 8-10 guys can be accommodated comfortably. Therefore, if you also planning take the route we have taken to hire good WebRTC devs, then do let us know.We can plan the training program together as well.
Feel free to adopt the above course structure for your training programs as well. If you need even more details about our in-house training program or the content of it, feel free to drop us a email at hello@centedge.io.
Hope this helps.